Показаны сообщения с ярлыком Faber Castell. Показать все сообщения

пятница, 11 октября 2013 г.

Apple Layout - The Scrapbook Diaries

Finally I am happy to share with you my second LO made for The scrapbook Diaries Kit.

Еще одна страничка, которую я делала для The Scrapbook Diaries,
я уже рассказывала вам, что мне прислали  скрап радости, и на свой вкус и выбор, я собрала набор  и сделала видео, по которому можно воссоздать подобную работу, при покупке этого набора.

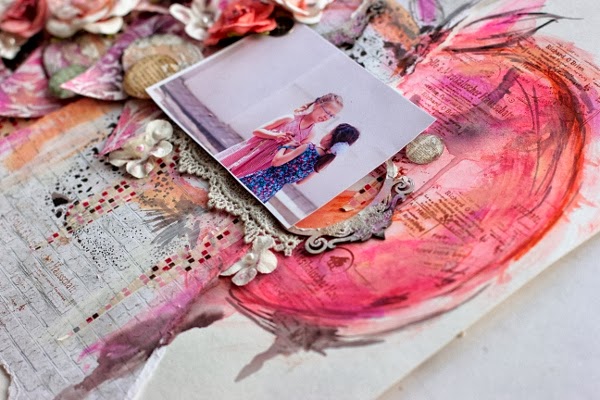
  When Janene has found me , she liked my LO made for Faber - Castell Design Memory Craft. I make some aquarelle drawing on the background using the pencils and Gelatos. So I decided to create one more LO with some tips on using Aquarelle pencils and Gelatos.
  The idea of drawing the apple is not new, as I was inspired by the work of Russian artist Elena Sevrina and then by Stacey Young. But I thought that apples are so Autumnal theme for me, I can not live a day not eating them so I wouldn't go different way by drawing the pear or a peach, and I created an Apple too.

Собственно говоря, вы, возможно, помните страничку, которую я делала для блога Faber - Castell, когда была там приглашенным дизайнером в течение всего лета.
Я там рисовала на фоне цветы. Так вот я решила попробовать снова вспомнить уроки рисования и с помощью акварельных карандашей и джелатос получилось вот такое яблочко.
Тема я блока не новая, идею почерпнула у Лены Севриной и Stacey Young. Конечно, хотелось выпендриться и нарисовать Грушу или Персик, а потом я подумала, а надо ли?
Я ведь яблоки люблю больше всего и в день я должна съесть минимум 2 яблока, иначе чувствую себя плохо.
Так что вот такая вот Любовь и Яблоки.
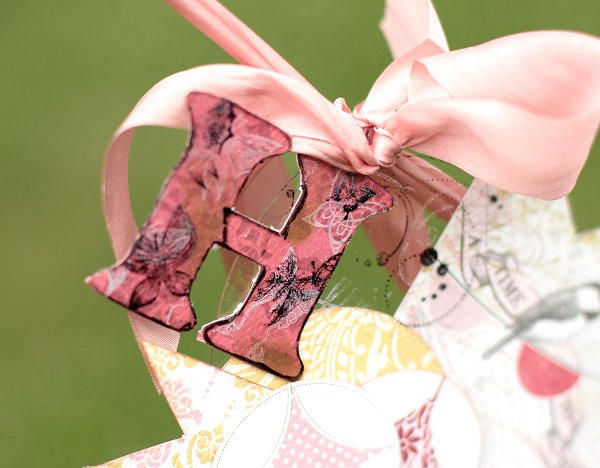
Janene sent me all new stuff from Prima, so I was happy to use new stamps, flowers and mediums.
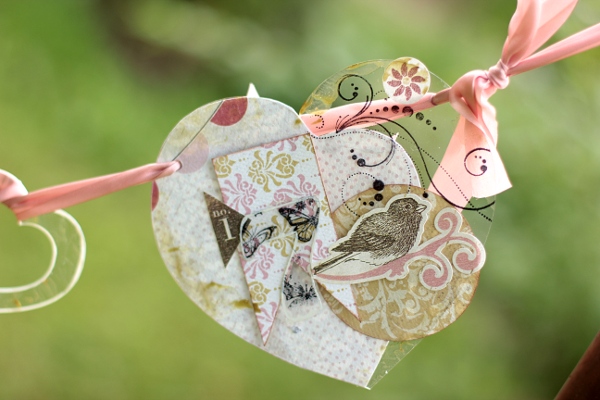
I added some of my favourite Vintage Chipboard Frames by 2Crafty 


Also I liked the canvas sheet by Prima, which I colored with the Gelatos and cut into the banners.
Added some Glitz Rhinestones and many Prima flowers.


But surely drawing was the main focus and a great pleasure for me

I made a video tutorial on how I created this LO and you can enjoy it with the purchase of the kit.

А еще хотела сказать на прощание.
Знаете, когда организуется конфетка, то приходит много новых читателей, это, конечно, здорово. А потом объявляется победитель конфетки, и глядишь,  несколько человек так раз, и ушли.
Не буду ничего комментировать по этому поводу.
Но хочу сказать спасибо всем моим новым читателям, и стареньким, конечно, тоже.
Потому что после оглашения результатов ушел от меня только один человек, но на следуюущий день, добавился сразу новый.
Это значит, что я интересна не только своими конфетками.
Спасибо за поддержку,
а вот Таню Валееву прошу связаться со мной, я вышлю вам небольшой презент.
Просто мне захотелось кого-нибудь порадовать просто так.
Никакого расчета, просто это тот новый читатель, который стал меня читать после заверешения конфетки.
И скоро, я вернусь с еще одной конфеткой.

вторник, 24 сентября 2013 г.

My September 2Crafty Reveal


It's time to share my projects for 2Crafty chipboard this month. And I will start with a LO
This time I was using my fav Gelatos and Aquarelle Pencils by Faber - Castell Design Memory Craft, as for the background as well as for the chipboard:

Сегодня - страничка для блога 2Crafty Chipboard
в этот раз все, включая фон и чипборд, - работа с моими любимыми Gelatos  и акварельными карандашами от Faber - Castell Design Memory Craft

The first Layout is called Create Memories. I still can not stop scrapping the photos of my little baby son
I played with pink colors as I wanted to explore how it could be used for a Boy LO.
I used Frames Tiny Victorian  and placed them in 2 different places. This one I colored with Gelatos and inked with chalk in, my favorite technique.

 
 I put some modeling paste on the second frame and then just inked it with chalk ink too.
 

The same techniques were used on Roxy's Flourish, which I cut into 2 parts . Placed the vine part under the photo
 

And the second part I put into the corner of the photo and it looks now like a heart.
 
 and it is so easy to add the final touch just using the Light Bulb. I primed it firstly, and then applied gesso and misted with dark brown ink.
 
Делала по скетчу Сохраняя Лучшее
( как всегда увлеклась)
так что такая вот вольная интерпретация скетча


вторник, 20 августа 2013 г.

September Sketchbook 365 and 7Dots Studio

A LO made for September Sketchbook 365 challenge

Страничка для блога

and here is the sketch for September


First I tried to make this LO clean and simple, without any mediums and embellishments. I used 
Hopefully Collection by 7Dots Studio, it's very sweet and airy.
But when I have finished I realized that it is too flat for me,
I added 2Crafty Chipboard Hot Air Baloon and Grass Clump

Бумага Hopefully Collection от 7Dots Studio,
джелатосы Faber - Castell

Colored it with Faber - Castell Gelatos and stamped with Vilda Stamps


distressed Manor House Creations flowers and 
now. well it looks too messy and busy,
what do you think?

такой простой скетч.
Поэтому я решила и старничку сделать очень простой, а-ля клин энд симпл.
Сперва все было только из бумаги.
Но потом мне показалось как-то все плоско, мало и скучно.
в итоге , по-моему, я переборщила и с раскрашиванием и с декором.
КАк вам кажется?

пятница, 16 августа 2013 г.

Girly Layout - Maja Design

Today I have a girly Layout to share with you, made for Maja Design blog. Though it is not so girly as you have used to see, but I tried to make it look girly and shabby even with some mixed media techniques

Сегодня у меня для вас страничка для Maja Design 
 и небольшой МК,
как добавить ярких красок,
при этом сохранить прозрачность и налет шэбби

  I adore Äntligen collection by Maja Design, as it is full of so summer inspired papers, that are perfect to recreate summer mood in your projects.
I used quite a clean background , but I added some bright colors of Gelatos® by Faber - Castell Design Memory Craft. Here is a quick tutorial on creating watercolor effect with bright colors:


Я использовала коллекцию , которая просто идеальна для летнего настроения.
Для фона я выбрала довольно светлый лист
и покрыла его Гессо
Start applying the Gesso with a brush on your background randomly.
 Затем беру абсолютно разные по цвету Джелато
и прохожусь ими тут и там.

When it has been completely dried, apply some Gelatos in different colors
 Though it may look a little bit messy and looks like kid's drawing , don't be panic of too bright or unmatched colors, just  damp your brush with water and blend the colors 

Влажной кистью смешиваю цвета.
Выглядит как каракули, но позже все станет на свои места


Добавляю бумагу
и прохожусь штампами

 Add some paper layers, trimmed or distressed, and stamp over them

Затем наношу Гель Медиум
Когда он полностю высох,\
наношу сверху Джелато
и рисунок трафарета начинает понемногоу проступать

After then apply Gel Medium with a Pallette Knife and a stencil in some areas

Leave it to dry and then grab some Gelatos over the textured area


It may not be seen clearly, but it has some blurring look and I love this effect on the papers.
To add some texture too, I used cheesecloth and flowers

Added some lace trims and chipboard elements.

To finish my Layout I touched the papers and the embellishments with Gelatos as well
I hope you liked this coloring tips and don't forget to share with us your creations on our Facebook Page too.
Moreover
We will give away a complete collection randomly for each 1000 LIKES we reach by Aug 31.
А еще Maja Design на своей страничке в Фэйсбук рзыгрывает конфетку на каждую 1000 лайков.
Подробности здесь
А вообще я делала страничку по скетчу от Сохраняя Лучшее,
но затянула с редактированием,
но вы можете посомтреть как справились со скетчем другие дизайнеры

Products Used:
Maja Design Papers - Äntligen collection (Ljusblåa dagar, Kaffe på trappan, Vårlökar, Vårdagjämning), 2Crafty Chipboard, Manor House Creations flowers, Vilda Stamps, Faber - Castell Gesso and gelatos, Lace Trims and Cheesecloth


четверг, 15 августа 2013 г.

Coloring Embossed texture with Crafter Crayons and Gelatos


Сегодня у меня открытка, сделанная в качетсве Приглашенного дизайнера Faber - Castell Design Memory Craft

CardbyElenaOlinevich
Today I have a tutorial made as a part of my GDT over at Faber - Castell Design Memory Craft, featuring Paper Crafter Crayons™   and Gelatos® 
A textured cardstock is great for creating some visual effects on it. So to start with I took a cardstock and embossed it with my BigShot and embossing folder
CardTutorial1
  Then I took Paper Carfter Crayons™ in White and Silver and traced the embossed parts. These crayons are are highly-pigmented wax crayons, and I decided to experiment with melting the traced areas. I used my heat gun and some parts that were colored with white became invisible but the silver parts were still visible.
CardTutorial2
I started coloring the surface with Gelatos®, and what I have noticed - those parts colored with Crayons didn't hold the color on the textured parts, but well laid down on the area around . This  made the texture to pop up and it was great.
CardTutorial3
  After that I misted some parts with the water and heated it immediately. The colored parts with the Gelatos® became brighter.
Сначала я с помощью папки для тиснения сделала такие вот огурцы на бумаге.
Затем я прошлась по ним специальынми восковыми карандашами белого и серебристого цветов.
После расплавила их феном.
Что самое интересное, белый цвет пропал, серебристый остался.
После этого нанесла Джелатос, там где поверхность была покрыта этими карандашами,
они как бы съехали на фон, а на самой тисненной области либо вообще не остались, либо стали более приглушенного цвета.
Мне понравился этот эффект.
Местами побрызгала водой, эти места стали ярче.
Даже сияние видно.
CardTutorial4
  I distresses the lace with Gelatos and water, just rubbing it between the fingers.
Прокрасила кружево Джелатос тоже.
Каждый раз удивляюсь, какие интересные результаты получаются.
and here you are:
CardbyElenaOlinevich1
  can you see this shimmer of Metallic Gelatos and Silver Crayons? Just love it
CardbyElenaOlinevich2

Это был мой последний пост после 4-месячного пребывания в качестве приглашенного дизайнера Faber - Castell.
Но продукты мне очень понравились,
так то и впредь буду вас знакомить с техниками использования
этих бесподобных средств

воскресенье, 4 августа 2013 г.

Mixed Media Card - Faber - Castell GDT (Video Tutorial)

Today I am sharing one more project I made for Faber - Castell Design Memory Craft GDT

Еще один проект для Faber - Castell Design Memory Craft
в качестве приглашенного дизайнера


To start I made some drawing with paper Crafter Crayons™, they are waterproof, so you can easely add water or any wet mediums on them.
  I used some bright colors to create the background on the corrugated cardboard and watercolor paper. To achieve different dimmension on the surfaces I used The Gelatos® Tool Set . I made some drawing with paper Crafter Crayons™.

I made drips and splashes using Dot Dabber.

Использовала свои любимые Gelatos , еще Paper Crafter Crayons,
они похоже на восковые карандаши, только гораздо мягче.
Ну и иза-того , что в их основе воск, они водоустойчивы, так что сколько бы в дальнейшем не поливаоли и не пырскали на эти места, покрытые карандашами, они не потекут, что бывает очень важно для некоторых деталей.

To Stamp the Sentiment I used Stamper's Big Brush Pen and JustRite Stamps.
 Also I made some stamping on the background and applied Gelatos® using my fingertips as well as Palette Knife.
The flowers and Feathers are from Manor House Creations
and here is the result after cutting the papers and adding some embellishments:
Покажу открытку в блоге Чай с корицей в задании Blue Fern
( у меня гофро картон  имитирует деревянную структуру)
если, конечно, девочки примут такой вариант
и Полоски Лета от Ветер Перемен 
( мои полоски во всем- в обрывках бумаги, в волнах гофрокартона).
такое оно у меня - эко

  You can watch the process of creating the background in this video
Приятного просмотра видео и отличного воскресного дня
Have a wonderful Sunday

понедельник, 29 июля 2013 г.

My DD Birthday Post and a Banner for Her

Hello my scrappy friends.
I am very happy today, as there is a Birthday of my DD. She is 7 years old today. I can not believe that time goes so fast.
So I am busy with all these preparations and I promised her to devote my attention just her.
So there is a quick post sharing a Birthday Banner I made for her using Clear Scraps Banner

Всем привет!
Я сегодня в приподнятом натсроении, потому что моей дочке исполнилось 7 лет.
Мне очень сложно поверить, что ей УЖЕ 7, потому что, кажется еще вчера я носила ее на руках и не могла нарадоваться пухленьким ручкам.
Сегодня, она уже на границе уже не ребенок, еще не большой ребенок
и возраст такой кризисный. с увтерждением своего я.
Но я все равно ее обожаю и люблю.
А поскольку моя дочка с рождения отвергает всех кукол, ненавидит розовый цвет, 
я решила попробовать сделать ей банер,
с однйо стороны, он кажется малышковым,а с другой -
это ее тема - мишки , собачки
и палитра такая неч исто девичья.
Так что вот такой банер на акриле.

It was quite difficult for me to make the full shot of it, as it was a secret and I needed to hide to take some shots.

Ох и намучилась же с фотографированием его.
Сначала мы поехали на дачу, в тот момент ее снами не было, и это была прекрасная возможность все зафоткать.
Но как--то не все фотки у меня получились.
Поэтому общую фотку пришлось делать дома.
А сейчас летние каникулы, сами занете. не сильно мне от нее дома спрячешься.

  I like the acrylic for its transparency look, so I started with applying some mediums on banners

Не знаю, заметите ли вы на моих фотках,
 что по краю я нанесла Глэйз, смешанный со специальной пудрой от Lindy's/
он создает такой эффект красок по стеклу, нос  большим мерцанием.
вжизни очень красиво, такой оливковый цвет с золотом.
 So I took Lindy's Mica powder and mixed it with Glaze from Faber-Castell
Then using 6" Quarterfoil mascil I applied it quite heavily on the banners on the edges, as I didn't want to have a precise look of it.

Бумагу выбрала Carta Bella, чать акриловых украшенйи проштампила. 
вот результат
  My DD hates pink since her birth, I suppose, so I have chosen Carta Bella Collection.
I added some Acrylic Alphabets and Numbers and stamped some of them with VildaStamps


 I pulled down the silk May Arts ribbon and made some bows


  I added acrylic Key Embellishment


I hope she will like it

Надеюсь ей понравится.
я набираю пост накануне ночью ночь,
пошли мы с мужем украшать комнату и раскладывать подарки
есть унас такой ритуал.
Дошло до того, что неделю назад, все полотенца у меня были в стирке или грязные, и мне пришлось доставать новое из шкафа.
Я в шутку сказала - это тебе тоже на ДР.
так сейчас ложась спать , она попросила его тоже положить, 
хоть она им уже и пользуется.


Популярные сообщения